I've moved, to Ravelry. Look me up :delilahlane
I'm shortly moving most of my patterns there and will be posting the angry birds hat there soon.
I do this because I'm really, really bad at making blogs ><

about a girl, who loves to craft, and wants to share with the world her crafts.
Tuesday, June 21, 2011
Sunday, May 15, 2011
Countdown till wedding '11
May 21st is the big day, I'm excited, nearly ready to pass out and holding on to life... well for my life, as the saying goes.
I received a request for the angry birds hat pattern and I will be getting that in roughly a week. Back to my regular crafting schedule after that!
See ya'll soon!
I received a request for the angry birds hat pattern and I will be getting that in roughly a week. Back to my regular crafting schedule after that!
See ya'll soon!
Saturday, March 12, 2011
Lemon Cake Tissue Cozy


This is my first pattern ever, so any critique, suggestions, corrections and other photos are welcome. I made my cover in multipul peices and whip stitched them together with yarn, you can make it in fewer peices if you have the inclination and know how.
please do not sell my pattern, you may sell what you make from my pattern, but please do not sell the pattern itself.
Tissue box measurements: 4.25in x 4.25in x5.25in deep
Using H/8 (5.00MM)hook
Red Heart Worsted Medium weight yarn in cornmeal, white and chocolate
Top:
with yellow
ch16
1 skip 1 ch, 15 sc across
2-6 ch 1 turn 15 sc across
7 ch 1 turn. sc in next 2 sc, ch 11, skip 11sc, sc in last 2 sc
8-15 ch 1 turn. 15 sc across
Leave long tail for sewing and break off.
Icing sides (for corner peice you will need 2)
with yellow
Ch 16
1 skip 1 ch, 15 sc across
2-19 ch 1, 15 sc across.
before breaking off make sure that the sides are the length of your box. you can add extra lines if needed or deconsruct lines that are extra.
break off with long tail and secure.
Inside cake sides (for a corner peice I would make two again)
ch 16
begin with yellow
1 skip 1 chain, 15 sc across
2-3 ch 1. turn. 15 sc across
4 ch 1. turn. 2sc, mrge brown, 1sc, merge white 12sc
5 ch 1. turn. 12 sc, mg brown 1 sc, merge yellow sc in the last 2 sc
6-9 alternate 4 and 5 accordingly
10 ch 1. turn. 2 sc, merge brown 13 sc
11 Merge yellow ch1. turn. 15sc across
12 ch 1. turn. 15 sc across
13 merge brown, ch1. turn. 13 sc merge yellow 2 sc in last sc
14-19 starting with 4 and alternating with 5 again, it should resembe the first cake layer set.
20 ch 1 turn. 2 sc merge brown, 13 sc aross.
before breaking off make sure that the sides are the length of your box like with the icing sides.
sew together the peices according to how it looks. like sewing together the cake and icings and the top icing on top..... if you cant figure this out I'll wonder on your intermediate status of crochet. :P
You can do whatever you want witht the top decorative icing, be creative! But if you like what I did... here's how I did it.
Bottom trim: witht he top facing you, join white yarn on edge and ch 1, 4 sc in the same st, sl st in the next 2 stitches, *5 sc in the next st, slt sti in the next 2* repeat from * to * around the edge of the icing.
I repeated like this for the other parts of the decorations. I just decrased the amount of stitches in the same stitch.
Thursday, March 3, 2011
Organization, birthdays, and weddings... oh my!
I figured that after my birthday, things would settle down long enough for me to catch up with... well... myself. I was wrong. But it's a great thing, to be alive and to be able to do everything because I am alive.
Organization:
I'm a horrid organizational person. I'm either on the ball, or off of it. I walked into my sewing room where it was an absolute mess... I wanted to cry walking into the room, and realised that I tend to stay out of the room because it's so cluttered!

Between having no shelving and the room being storage for just about everything else, I was stressed. There seemed to be no way to fix it, no matter how many times I moved things around, the room was cluttered, the space was taken up by my dining room table which I had started to use as the craft table, despite it belonging in the dining room.
Bottom line. I needed to organize.

This is step two. A friend of mine has larger shelves with the same concept, and I'm hoping that this one will be enough. Since this picture has been taken I've stalled a bit, but I've gotten a bit more finished and hope to have it all finished by the end of the month. It's far more advanced than this image by the way.
These were my birthday gifts. You know a girl is known and loved when all of her gifts are yarn, beads and her most favorite superhero. My parents also gave me knitting needles. I didn't knit before then because I thought all the needles were so expensive and when I did try it was so confusing. My soon to be mother in law (who wants me to just call her mom) bought me a crochet and knitting for dummies book. I adore her for this. She also took me to borders and bought nearly everything I picked up. So there's a stack of books that are not pictured.
Oh and the new iPhone 4 that I took the photo with and my new digital SLR camera that I got and still have yet to figure out how to get the photo's off of.
Wedding:


Organization:
I'm a horrid organizational person. I'm either on the ball, or off of it. I walked into my sewing room where it was an absolute mess... I wanted to cry walking into the room, and realised that I tend to stay out of the room because it's so cluttered!

Between having no shelving and the room being storage for just about everything else, I was stressed. There seemed to be no way to fix it, no matter how many times I moved things around, the room was cluttered, the space was taken up by my dining room table which I had started to use as the craft table, despite it belonging in the dining room.
Bottom line. I needed to organize.

This is step two. A friend of mine has larger shelves with the same concept, and I'm hoping that this one will be enough. Since this picture has been taken I've stalled a bit, but I've gotten a bit more finished and hope to have it all finished by the end of the month. It's far more advanced than this image by the way.
Birthday:

These were my birthday gifts. You know a girl is known and loved when all of her gifts are yarn, beads and her most favorite superhero. My parents also gave me knitting needles. I didn't knit before then because I thought all the needles were so expensive and when I did try it was so confusing. My soon to be mother in law (who wants me to just call her mom) bought me a crochet and knitting for dummies book. I adore her for this. She also took me to borders and bought nearly everything I picked up. So there's a stack of books that are not pictured.
Oh and the new iPhone 4 that I took the photo with and my new digital SLR camera that I got and still have yet to figure out how to get the photo's off of.
Wedding:


The left flowers are the bridesmaids flowers. I'm short one because I need to get more floral tape which is supposed to be on it's way. Thank you friend! The right is the bridal. I'm still debating on adding more and making it more teardrop shaped like I originally intended. Any tips from past brides is welcome.
To save money we looked into making our own invitations. And I happened across a sale at Wal~mart of all the old wedding invitation 'print your own' sets and between two Wal~marts we managed to get enough and have plenty left over to go to the backup list.
I still need to get the table decorations and the isle decorations. I'm unsure as to how much the chair and tables will cost, and exactly how many we are getting, that is something that my wonderful fiancee is figuring out and will be getting back to me on.
I am ecstatic that I've also decided to start working out again, walking and eating healthy to make sure that my skin and my body is happier for the wedding and my honeymoon. This new app. My fitness pal is very helpful. and any iPhone/android/blackberry user I highly recommend it.
Thanks for sharing the journey with me,
Handmaiden Ashley
Monday, February 21, 2011
Happy birthday to me....
I planned on posting all of my wonderful bithday presents today, but it may have to wait.
It seems my mom is still a little off kilter from her heart surgery last year and has had a stroke. It's wonderful news that my mom is still alive and doing well, but I'm worried about her and will be visiting her in the hosptial today.
It seems my mom is still a little off kilter from her heart surgery last year and has had a stroke. It's wonderful news that my mom is still alive and doing well, but I'm worried about her and will be visiting her in the hosptial today.
Friday, February 18, 2011
This is how I spend my free time....
I have finally made it to my Nero game. Forgot to have my photo taken to show off my big hammer and my final creation of the uniform. For now I'm focusing on my wedding things and schoolwork.
Last week was finals week for school. This, to me, was hell with a side of a biscuit. My professor, as most do, tore into my web design and spit it out in ragged spittle covered bits. I'm not sure of which was is up and which way is down after that. Teachers, I beg you, if you're teaching an online class... please, please, please watch the wording in your comments. Is it meant to be snarky and negative? If not then why are you only pointing out things I messed up on? Record what you have fixed in previous viewings of the final projects and don't mark off your students for fixing what was initially your suggestion in the first place. This goes double for art based classes.
 This was one of the three finals I made, I used every skill crammed into my brain in a 6 week time span.
Folks. This is harder than it looks.

This was the second of the three. It was a wonderful project and the one I had the most trouble creating... Creating for a vague client with minimal information and the inability to ask any further questions than what I was given in a stats sheet.
Sounds like fun? Then maybe you should look into Graphic Design as a major. If not then you can sorta understand my frustration.
I apparently used the wrong type of text. I didn't know that there was a type of text that was correct. This was not explained to me either. Nothing aggravates me as a student more than being told that I'm wrong and being given no explanation as to how I'm wrong. How do you propose that I learn?

This one was the third project. A raw file that I was to make into this beautiful composition. It started out as a nearly black canvas. I gave it a white balance and sharpened the image. Adjusted some of the colors. And I think I fell in love with raw camera imaging. Before my final I hated raw camera formats. They always ended up nearly black, I could never find a program to open it (little did I know I already had the program with my photo shop suite) and every camera had it's own version of the raw format. It's a wonderful format, but since there is not a universally recognised format for this (because each company wants theirs to be on top) it's hard to learn unless you're in a classroom setting, and reading directions straight from a how to for dummies book.
From all the projects that I turned in. I learned the most from the final one... photography may not be my preferred media, but I found a new love of it with this project. There is something to be said for photographers and the amount of skill needed to make a picture look good.
Anyone can point and click.
On that note.... I wish you all happy crafting, and much learning.
Handmaiden Ashley
Last week was finals week for school. This, to me, was hell with a side of a biscuit. My professor, as most do, tore into my web design and spit it out in ragged spittle covered bits. I'm not sure of which was is up and which way is down after that. Teachers, I beg you, if you're teaching an online class... please, please, please watch the wording in your comments. Is it meant to be snarky and negative? If not then why are you only pointing out things I messed up on? Record what you have fixed in previous viewings of the final projects and don't mark off your students for fixing what was initially your suggestion in the first place. This goes double for art based classes.

Folks. This is harder than it looks.
This was the second of the three. It was a wonderful project and the one I had the most trouble creating... Creating for a vague client with minimal information and the inability to ask any further questions than what I was given in a stats sheet.
Sounds like fun? Then maybe you should look into Graphic Design as a major. If not then you can sorta understand my frustration.
I apparently used the wrong type of text. I didn't know that there was a type of text that was correct. This was not explained to me either. Nothing aggravates me as a student more than being told that I'm wrong and being given no explanation as to how I'm wrong. How do you propose that I learn?

This one was the third project. A raw file that I was to make into this beautiful composition. It started out as a nearly black canvas. I gave it a white balance and sharpened the image. Adjusted some of the colors. And I think I fell in love with raw camera imaging. Before my final I hated raw camera formats. They always ended up nearly black, I could never find a program to open it (little did I know I already had the program with my photo shop suite) and every camera had it's own version of the raw format. It's a wonderful format, but since there is not a universally recognised format for this (because each company wants theirs to be on top) it's hard to learn unless you're in a classroom setting, and reading directions straight from a how to for dummies book.
From all the projects that I turned in. I learned the most from the final one... photography may not be my preferred media, but I found a new love of it with this project. There is something to be said for photographers and the amount of skill needed to make a picture look good.
Anyone can point and click.
On that note.... I wish you all happy crafting, and much learning.
Handmaiden Ashley
Thursday, February 3, 2011
The Dual Tailed Jesters Hat
This hat was created for my larp charater Cabbage. She has a Harley Quinn twist to her so I wanted to make a hat for her. At first I crochet a hat that I ended up liking for every day use rather than for Cabbage. I searched idly for a two tailed Jesters hat, and finding only three tails and the paper triangle ones I finally gave up and decided to make my own and share.
I give you my simple Dual Tailed Jesters Hat!


 1. Select your fabric. You can choose up to four different colors, but if you're still a newbie at sewing I suggest two colors to simplify things. You will need at the most 1 yard per color. Scraps from this are great for other projects and for decorations.
2. Measure out the Width for your fabric, this would be for the point at the center of your head to the end of the tail. You can make this longer and shorter as you wish. I wanted super long tails so I used the entire width of the fabric.
 3. Measure out the height of the fabric. This should be at least 10 inches. The longer you make it the deeper the hat. If you have thick hair or a large head you may want to cut it at 12 or 13 inches.
4. Repeat steps 1-3 three more times. Stack your newly made rectangles on top of eachother. Be sure to line them up as straight as possable. It wont be the end of the world if they're crooked but it makes it much easier if the cuts are straight.
 5. Cut out this shape. Below is further detail as to how to make the cut. Be sure to save the upper 'heel' for scrap and decorations for your hat.

5a. Measure your head around, divide it by 4 and add 2 inches for sewing and comfort. This will be the opening area and you will begin your curve here.
(I can use my measurements as an example, my head is 24 inches around. 24/4=6 inches. 6+2=8 inches.)
 5b. Leave at least 2 inches at the bottom for sewing allowances. You can add more if you want the tails to be chunkier, and likewise you can subtract more, for finer smaller tails. I suggest not going smaller than two inches because it may be hard to turn it inside without tearing out the stitch.
 6. Pin together your two seperate sides, if you are like me and have the same colors on one side then pin those two colors together. Where you want to pin is the outside top edge and the edge of the tail leading up to the 90* angle. Do not pin this angle. Sew your edges, but do not sew that angle, this is your opening to attach and for your head. Below images show you where not to sew.


 7. Turn your hat inside out, At this point you will want to add any decorations to the hat such as extra fabric, iron ons, and bells or poofies to the end of your tails.
I chose to sew diamond shapes of green into the black and minature crochet cabbage roses to the ends of the tails. 8. Turn in the edge of your head opening to around an inch pin and sew. This is where you would slide in the elastic if you wish. The elastic helps keep it on your head so I highly suggest it. Be sure to leave a gap big enough to thread the elastic through. Once that is done sew the gap closed.
Arrange your fabric as you want it and now you're done and it's ready to wear!
See Dual Tailed Jesters Hat and 1000's of others - or share your own on Cut Out + Keep
I give you my simple Dual Tailed Jesters Hat!


2. Measure out the Width for your fabric, this would be for the point at the center of your head to the end of the tail. You can make this longer and shorter as you wish. I wanted super long tails so I used the entire width of the fabric.

4. Repeat steps 1-3 three more times. Stack your newly made rectangles on top of eachother. Be sure to line them up as straight as possable. It wont be the end of the world if they're crooked but it makes it much easier if the cuts are straight.


5a. Measure your head around, divide it by 4 and add 2 inches for sewing and comfort. This will be the opening area and you will begin your curve here.
(I can use my measurements as an example, my head is 24 inches around. 24/4=6 inches. 6+2=8 inches.)


7. Pin together the two colors along the middle line and sew. Be careful not to sew the opening of the head space closed or to the color connecting areas. I did it once and even with a seam ripper it can be a pain to undo.

 7. Turn your hat inside out, At this point you will want to add any decorations to the hat such as extra fabric, iron ons, and bells or poofies to the end of your tails.
 I chose to sew diamond shapes of green into the black and minature crochet cabbage roses to the ends of the tails.
 8. Turn in the edge of your head opening to around an inch pin and sew. This is where you would slide in the elastic if you wish. The elastic helps keep it on your head so I highly suggest it. Be sure to leave a gap big enough to thread the elastic through. Once that is done sew the gap closed.
Arrange your fabric as you want it and now you're done and it's ready to wear!

See Dual Tailed Jesters Hat and 1000's of others - or share your own on Cut Out + Keep
Monday, January 31, 2011
Sushi, if you have ovaries it's 99.9% certain you like it...
I don't know what it is about Sushi that I love so much. Maybe it's the use of foods that I normally wouldn't eat or the fact that anyone who eats it overseas is like super thin so I think it'll make me the same way.... Don't laugh, I'm already short enough.
I decided that paying $20 for some semi-professionally made Sushi was waaaaayyy to expensive and wanted to make my own. So I went to my local oriental store and bought the fixings. This was only around $10 and left me with enough leftovers for five times the servings.
It took me a while to find the correct oriental place, because apparently typing in oriental grocery store in the local restaurant brings up anything from nail salons, Wal-Mart, and nearly any culture of food not American. I decided to write down the few that actually seemed to match my search criteria and go see them. The first one was out of business. The second was Thai. I saved that one in my memory banks for a different set of dishes, but still wasn't the correct. The third one I struck gold. I walked into the store, and I'm not sure if it was because I was giggling at all the candy (I love Japanese candies) or that I was the only one in the store with Irish skin, green eyes and red/blond hair, but the lady asked me if I was wanting to make Sushi and promptly whisked me around the store to get everything that they carried for sushi. She offered me a rolling mat, but I declined. As sure as I am that this mat is well worth it, I am in no state to spend $30 on a mat. She offered me the fresh fish as well, but again I turned it down. As sure as I am that I can make sushi, I'd rather be safe and make it with precooked crabmeats, fresh veggies and cream cheese.
I got home and started in on the rice. That was the easy part. Then I added the veggies and other items to make my sushi. After that I rolled... with wax paper. I only had a little bit of it, so I had to use it sparingly, but it worked as a suitable substitute for making the sushi.
My ending product appeared as such:

After some thought and digestion I went looking for further inspiration online for sushi types and recipes that I might be able to make at home with pre-cooked or other sushi approved foods that don’t exactly need cooking.
I didn't find much but one thing caught my eye.
Sushi Crochet......
I'm in heaven.
via http://shellatin.blogspot.com/2010/06/sushi-pattern.html This young lady I was able to make this:

Oh, and the title of the journal? The Fiancée likes to say that I'm female and therefore I love sushi... surveying my friends, he's probably correct.
I decided that paying $20 for some semi-professionally made Sushi was waaaaayyy to expensive and wanted to make my own. So I went to my local oriental store and bought the fixings. This was only around $10 and left me with enough leftovers for five times the servings.
It took me a while to find the correct oriental place, because apparently typing in oriental grocery store in the local restaurant brings up anything from nail salons, Wal-Mart, and nearly any culture of food not American. I decided to write down the few that actually seemed to match my search criteria and go see them. The first one was out of business. The second was Thai. I saved that one in my memory banks for a different set of dishes, but still wasn't the correct. The third one I struck gold. I walked into the store, and I'm not sure if it was because I was giggling at all the candy (I love Japanese candies) or that I was the only one in the store with Irish skin, green eyes and red/blond hair, but the lady asked me if I was wanting to make Sushi and promptly whisked me around the store to get everything that they carried for sushi. She offered me a rolling mat, but I declined. As sure as I am that this mat is well worth it, I am in no state to spend $30 on a mat. She offered me the fresh fish as well, but again I turned it down. As sure as I am that I can make sushi, I'd rather be safe and make it with precooked crabmeats, fresh veggies and cream cheese.
I got home and started in on the rice. That was the easy part. Then I added the veggies and other items to make my sushi. After that I rolled... with wax paper. I only had a little bit of it, so I had to use it sparingly, but it worked as a suitable substitute for making the sushi.
My ending product appeared as such:

I know, professional right?
After some thought and digestion I went looking for further inspiration online for sushi types and recipes that I might be able to make at home with pre-cooked or other sushi approved foods that don’t exactly need cooking.
I didn't find much but one thing caught my eye.
Sushi Crochet......
I'm in heaven.
via http://shellatin.blogspot.com/2010/06/sushi-pattern.html This young lady I was able to make this:

Sushi and crochet, who knew!
I am going to try more. Ah, and I plan on making a tutorial for how to do Sushi, that is, if there's truly an interest.Oh, and the title of the journal? The Fiancée likes to say that I'm female and therefore I love sushi... surveying my friends, he's probably correct.
Tuesday, January 25, 2011
My furst Tutorial. The bunny ears!
I'm super excited today. I made my first Tutorial. Now granted this was on another webpage, but I can move it here if requested in the comments enough.
I also made a purse. A blue jean purse that will be sold on etsy, but I'm unsure as to how much I should ask for, because most of it was made from recycled stuff.
Mmmm recycling. That makes me feel a little better about rubbing the thighs out of my jeans.
See Superlong Floppy Rabbit Ears and 1000's of others - or share your own on Cut Out + Keep
Friday, January 21, 2011
Running on Empty
Running on, running on empty
Running on, running blind
Running on, running into the sun
But I'm running behind
Okay, maybe not behind..... but now that I have that song stuck in your head I will tell you about my current projects. Then maybe you can tell why I feel like I am running non stop.
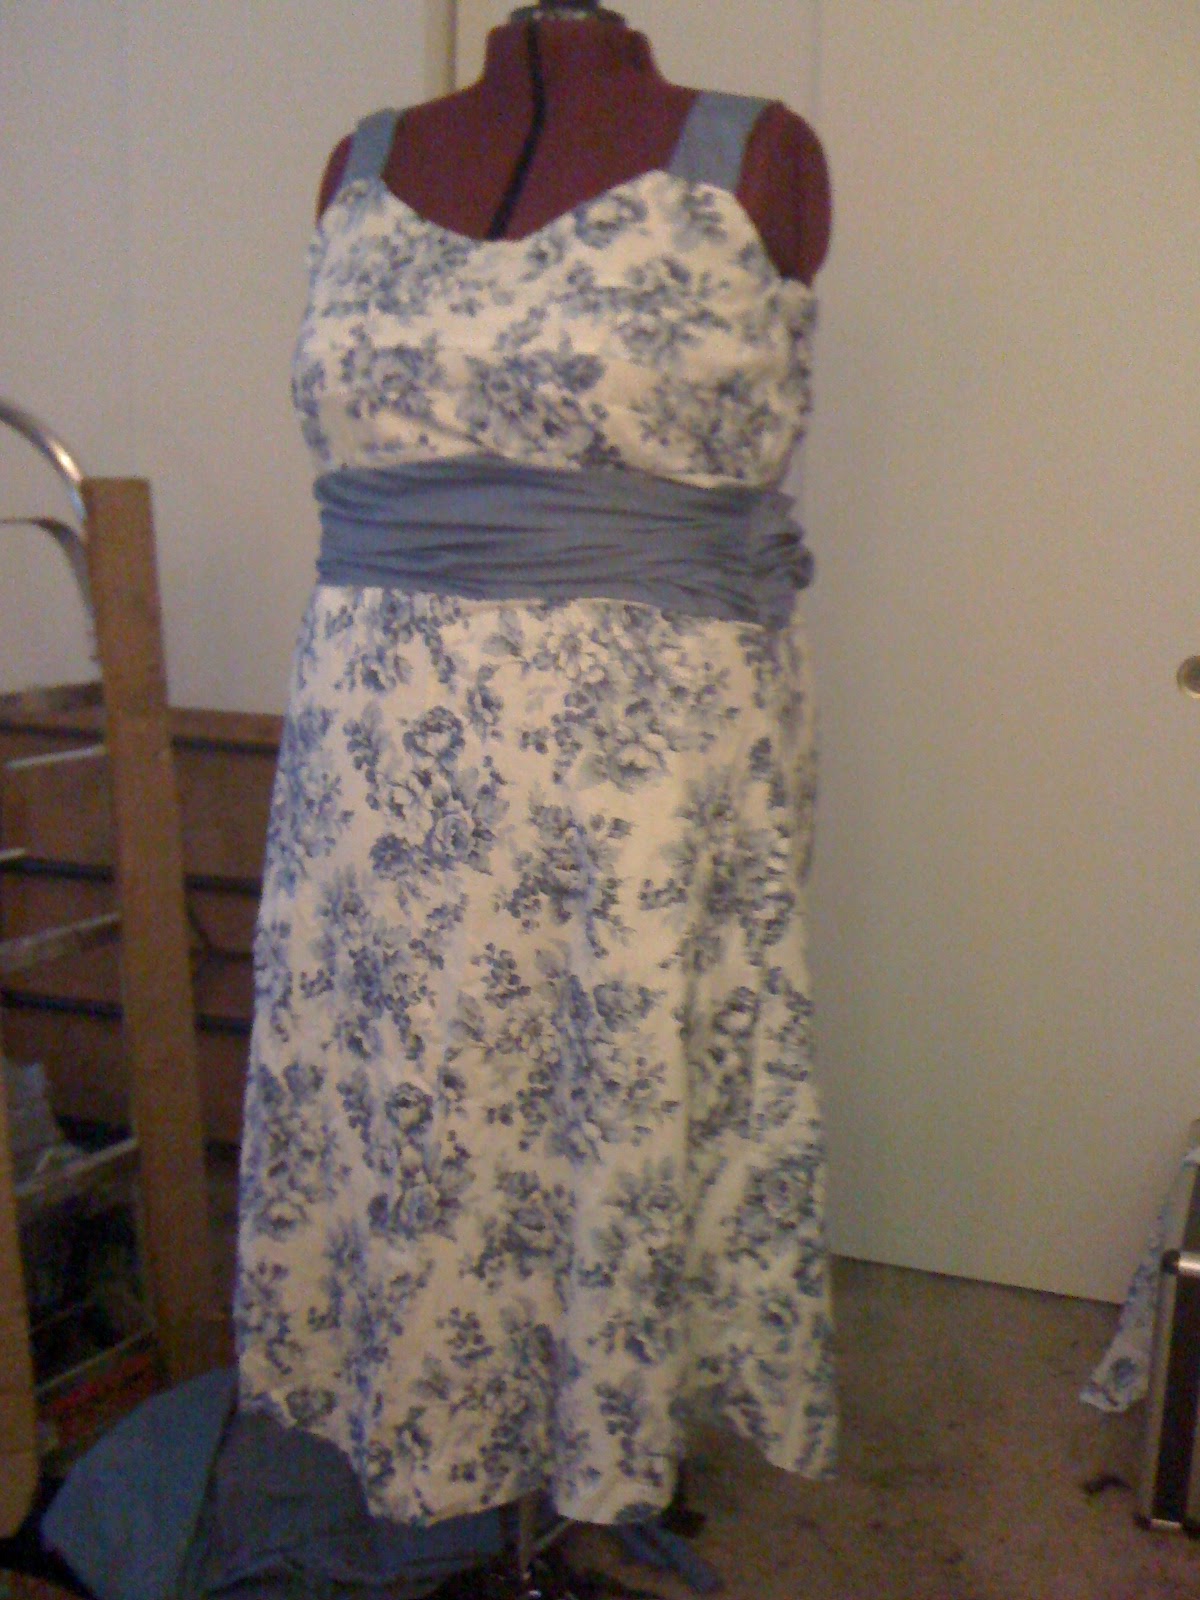
The dress:
This is my second dress ever. The first one running without a pattern. I had a few ideas and a couple of paper bags and started from there. I am absolutly in love with making this dress, but I'm unsure as to where it should be finished. or when for that matter.
The beginning of the week:
 As of yesterday: Only the skirt hemming left.


My other process of project is cats paw fingerless gloves.
I was supposed to make a tiger for a customer... but I forgot the stripes. So I have two just orange gloves. Well one finished one and one in progress.


And two things that I finished that I'm insanely proud of:
Bear ears: they're for a beary good friend:

 And this has been my week.
Next week, more projects, this weekend, a little rest.
Handmaden Ashley
ps. Coupon code for this weeks etsy sales 5% off at my store: "NEWREADER"
Running on, running blind
Running on, running into the sun
But I'm running behind
Okay, maybe not behind..... but now that I have that song stuck in your head I will tell you about my current projects. Then maybe you can tell why I feel like I am running non stop.
The dress:
This is my second dress ever. The first one running without a pattern. I had a few ideas and a couple of paper bags and started from there. I am absolutly in love with making this dress, but I'm unsure as to where it should be finished. or when for that matter.
The beginning of the week:


My other process of project is cats paw fingerless gloves.
I was supposed to make a tiger for a customer... but I forgot the stripes. So I have two just orange gloves. Well one finished one and one in progress.


And two things that I finished that I'm insanely proud of:
Bear ears: they're for a beary good friend:

And then there was the angry birds hat for my fiancee... I'm happy he loves it.

Next week, more projects, this weekend, a little rest.
Handmaden Ashley
ps. Coupon code for this weeks etsy sales 5% off at my store: "NEWREADER"
Tuesday, January 18, 2011
Today Is Grand
I'm an excited woman. I made my first offical Etsy sale today. One of my pink earflap hats, which makes me completly estatic that someone has bought something.
Today has been mostly decoration of the Etsy shop, restocking the shop and brainstorming ideas. My housekeeping has been a bit lax as well, mostly because of the busy schedule I've had lately, so I decided to catch up on that as well.
I found a gold mine of old patterns and older fabrics that would make great things. These were all my mothers, she's given them to me because she rarely uses any of the fabric, and most of it has been in storage for a long time.
I nearly peed myself when I found old carebear patterns. These will be utalized, and I'll keep those projects up to date on this blog. I am estatic that I found these.
My Etsy shop was added to someones favorite shop as well... I think I'm slowly getting up there as a seller. I hope so anyway.
Heres to being creative!
Monday, January 17, 2011
To begin, press here.
Greetings!
Okay, that was kinda hokey.... I'm full of that so please bare with me... or is it bear with me. Either one sounds like more fun than it acutaly is. First lets start with some background!
My name is Ashley, I'm a 25 year old woman who loves to do things with my hands. Crafting specifically. I have learned to sew from my mother, to have an eye for the arts from my many teachers and taught myself to crochet after being inspired by a very happy hooker.
I can safely say that I am happy with how my life is going at this very moment. Dispite being jobless, still in school for my two year degree in Graphic Design, and having fairly few friends. Scratch that. I started school over because I want to finish, I have an etsy store, and while it's not top of the line, it's gone further to make me happy than any other job I've had. And I have friends. I love them dearly. We're all drama infested, as big groups nearly always are, but they're still mine. I have many friends.
I have suffered from a long life of confusion and being socialy awkward and I'm happy to say I've finaly found my lot in life, and the love of my life. He's what I immagined the love of my life to be, supportive, protective, loving, a little silly... in many ways, like my father. Though, my fiancee has half of my fathers vices and a quarter of my fathers income. I think this is a fair trade. We are getting married on the 21st of May this year.
And the blog, I'm making the blog to well. Make myself happy, the same reason why I make my crafts. I hope to be able to share my experiances with everyone and have questions answered when possable as well as answering questions. But for the most part, I'll share and craft, and keep my friends updated. This is for everyone, but mostly... for me.
Subscribe to:
Posts (Atom)